
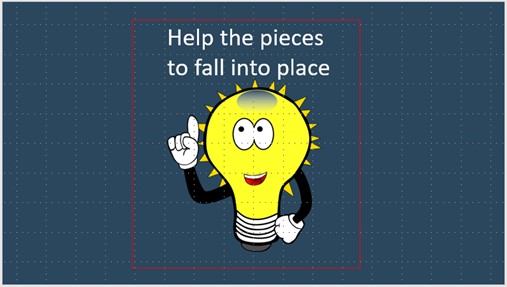
How to animate a jigsaw puzzle in PowerPoint
I’ve been playing with animations for the purpose of promoting my Membership Programmes. Having managed to animate a jigsaw puzzle quite successfully, I thought I’d share how I did it. I was inspired by the instructions I found at https://blogs.articulate.com/rapid-elearning/build-a-puzzle-animation/ but have taken a slightly different approach – not least because I’m using a slightly more recent version of PowerPoint than 2007!
So how do you animate a jigsaw puzzle?
The secret is to make your jigsaw pieces look like the background but actually cover up your image, so they gradually reveal the image as they disappear. Much easier than cutting your image up into lots of little luggy pieces and then reassembling them!
Putting the elements together
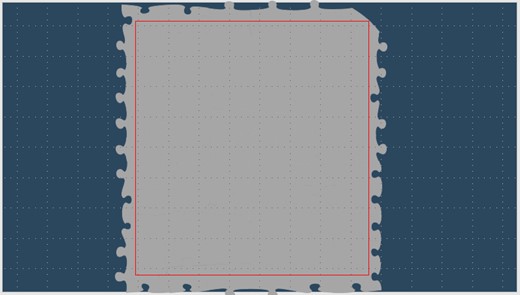
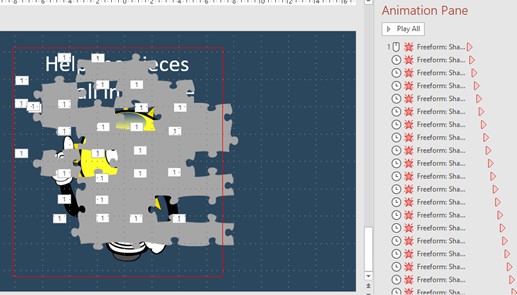
Step 1: Prepare your background. The thin red box is going to go just outside the edge of the area I’m going to record; it’s there to make sure that I keep the image centred and don’t have any bald patches round the edge.
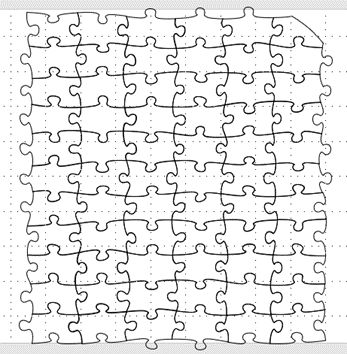
Step 2: Find a clipart jigsaw puzzle image that will allow you to ungroup it. I found that I could do this if the image was in SVG format; JPG is no use and I don’t think PNG will work either. Make sure it’s one that you have permission to use! Search for “CC0” and “royalty-free” for free images.
Step 3: Paste your jigsaw into a separate PowerPoint slide, right-click on the edge of it and select Group > Ungroup. You’ll be asked if you want to convert it into a drawing object; say yes. If it’s bigger than you need it to be then you can delete any unwanted bits at this stage, but don’t delete too much!
Step 4: Change the fill colour of the whole jigsaw to whatever colour you want the “background” to be. Repeat for the outline colour.

Step 5: Make a copy of the slide with the background image (just in case you accidentally delete something you meant to keep!) and paste a copy of your jigsaw on top of it. You might want to right-click on the edge of the jigsaw and select Send to Back > Send Backward, so that the red box is visible on top. If necessary, re-size the jigsaw so that no part of the red box is outside it.
Setting up the animation
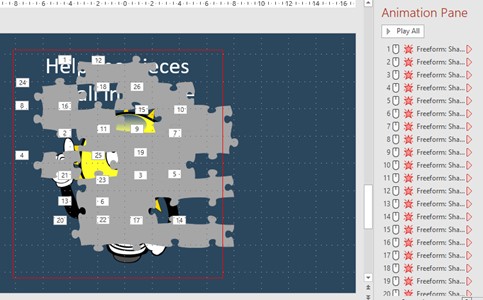
Step 6: If you want to have your jigsaw partially revealed to begin with, delete the pieces where you want bits of the image to be visible. You can also delete any pieces that are entirely outside the red box.

Step 7: Now right-click on the edge of the jigsaw again and select Group > Ungroup. This time it will break up into its constituent pieces.
Step 8: Animate each remaining piece of the jigsaw so that they all disappear one by one. Use “Disappear” or “Fade”. Don’t make the pieces fly across the screen, or you’ll destroy the illusion of the puzzle being constructed! I suggest animating each one individually on a click first, and experimenting until you’re happy with the order. Then you can change all except the first one to “Start after previous”. Mine has a delay of 0.2 seconds per piece. (I also added an animation to the lightbulb at the end.)
Step 9: Open the animated slide in Slideshow mode, fire up your screen recorder of choice (I used Screencast-o-Matic; the basic package is free and that’s all you need for this) and adjust the capture frame so that it’s all inside the red box.
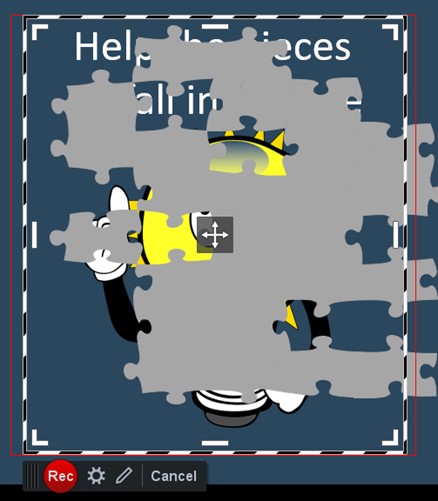
Finally, start recording and click the mouse button to set your animation in motion!
If you’ve found this post helpful then please let me know in the comments below. If you know someone else who you think might like it then please share it with them too.