

How to make a DIY visualiser for free using an old smartphone
Ever wondered if it’s possible to make a DIY visualiser (document camera) out of kit that you already have at home? It’s actually pretty simple; there’s really no need to spend £50+ on a Hue or similar camera if it’s only going to be for occasional use.
What does a DIY visualiser do?
If you’re teaching remotely then a DIY visualiser allows your students to see what you’re doing on the desktop. This setup could also be used by students who are learning remotely, perhaps with an online tutor, and prefer to write on paper rather than on screen. And it’s cheaper than buying a graphics tablet to facilitate on-screen writing.
It could also be useful for live video tutorials, for example involving crafts or cookery. (I’ve done a series of calculator tutorials using mine.)
All you need is a spare smartphone or tablet, a free phone app and some kind of support to hold the phone in place. You don’t even need a SIM card in the phone, since it works over either WiFi or a USB connection.
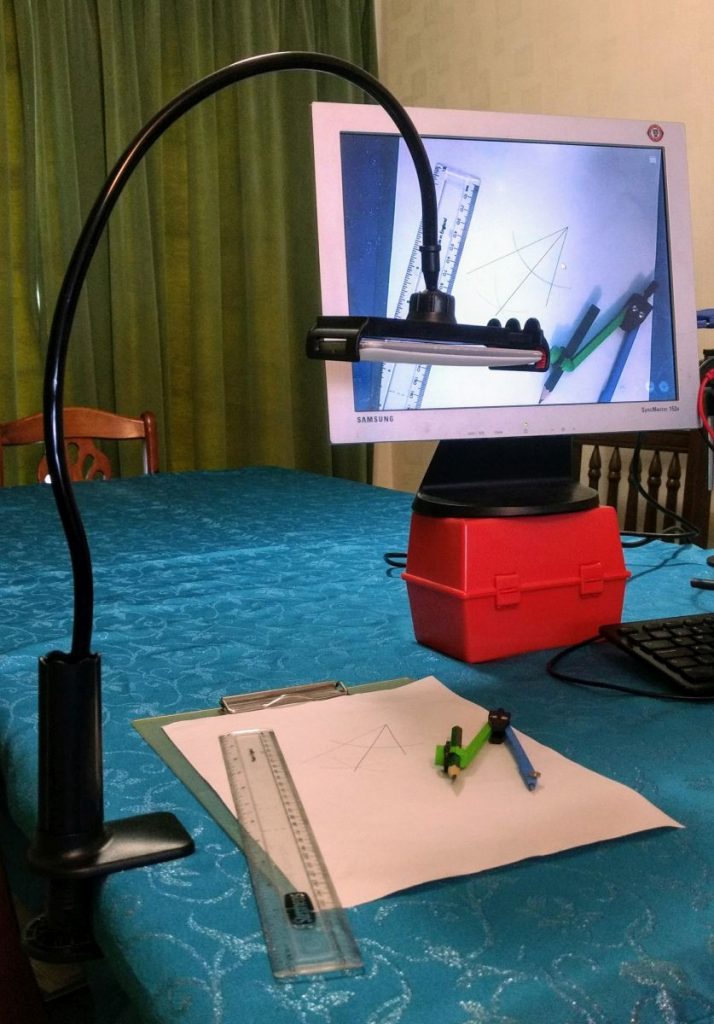
The photo above shows a cheap gooseneck stand – I recommend a G-clamp design like this, since it won’t topple over as a free-standing phone support might – but you can get away with a stack of food tins at a pinch! Just remember to also put a weight on top of the phone if you’re using that approach. Below is another no-budget (albeit slightly precarious!) setup used by fellow tutor Jennifer Bibby!

What software do I need?
There are multiple webcam apps available; just try a few and see which ones you get on best with. They come in two basic varieties:
Type 1: View the output through your browser. If you use this option then you can share the DIY visualiser view with your students (or teacher/tutor) by sharing the screen. The ones that I’ve tried show the IP address as an overlay on the phone screen, and all you need to do is type the IP address into your browser and then bookmark it for future use.
Type 2: Install a client on your computer, which will allow the computer to see the DIY visualiser as a separate camera. This option means that you can select either your main webcam or the phone cam for your main window in Zoom, Google Meet, Microsoft Teams or whatever other video conferencing app you are using.
My own DIY visualiser uses an Android app called CamON, which is free and comes under Type 1. IPWebcam is another example of this type, though I’ve found CamON simpler to use. There’s a lag of half a second or so (over WiFi) but that shouldn’t matter too much for most teaching purposes.
Type 2 apps include DroidCam and iVCam, but I’ve found that the free versions of these aren’t sufficiently high resolution to allow the sharing of printed material from a text book. There may be others that offer higher resolutions for free; iVCam did at first, and worked very well, but what I didn’t realise was this this was a free trial of the paid version. But if you like the app enough, and want the option of being able to switch between cameras, then you might want to consider the upgrade. I seem to remember it was only about £10 – much cheaper than buying a dedicated visualiser.
A word of warning, though: these apps all drain the phone battery pretty quickly – mine has about a 2-hour life – so remember to turn the camera off when not in use! If you’re going to use your DIY visualiser for more than an hour or two at time then it may be worth investing in a purpose-built document camera.
So there you go – an easy way to make a DIY visualiser. I hope you’ve found this helpful; please comment below if you have anything to add. Maybe you’ve tried a different app (perhaps one for iPhone – I can’t comment on those!) and would like to feed back on how well it worked.
If you’d like an introduction to using Zoom and BitPaper for online teaching/learning, take a look at this blog post.
For more help with Maths and online learning, visit my website at https://b28mathstutor.co.uk.

If you’ve found this article helpful then please share it with anyone else who you think would benefit (use the social sharing buttons if you like). If you have any suggestions for improvement or other topics that you’d like to see covered, then please comment below or drop me a line using my contact form.
On my sister site at at mathscourses.co.uk you can find – among other things – a great-value suite of courses covering the entire GCSE (and Edexcel IGCSE) Foundation content, and the “Flying Start to A-level Maths” course for those who want to get top grades at GCSE and hit the ground running at A-level – please take a look!
If you’d like to be kept up to date with my new content then please sign up to my mailing list using the “Subscribe here” form at the bottom of this page, which will also give you access to my collection of free downloads.